
Flexible laminate: the benefits of a new floor covering and the rules for laying it
Perhaps everyone knows what a laminate is. We are used to the fact that in any construction supermarket a stand with samples of laminated particleboard panels is always installed. But now in the same shops you can find other material with a more intriguing name - “flexible laminate”. In its appearance, it almost does not differ from ordinary, but is characterized by special flexibility, wear resistance and ease of installation. What kind of coating is it, what are its advantages and how to lay it? We will give comprehensive answers to all these questions that will inevitably arise for any interested consumer right now.
Content
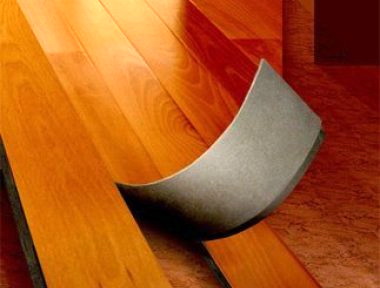
Flexible laminate - what kind of coating is it?
A flexible laminate is elastic vinyl tiles made in the form of strips. They consist of two layers:
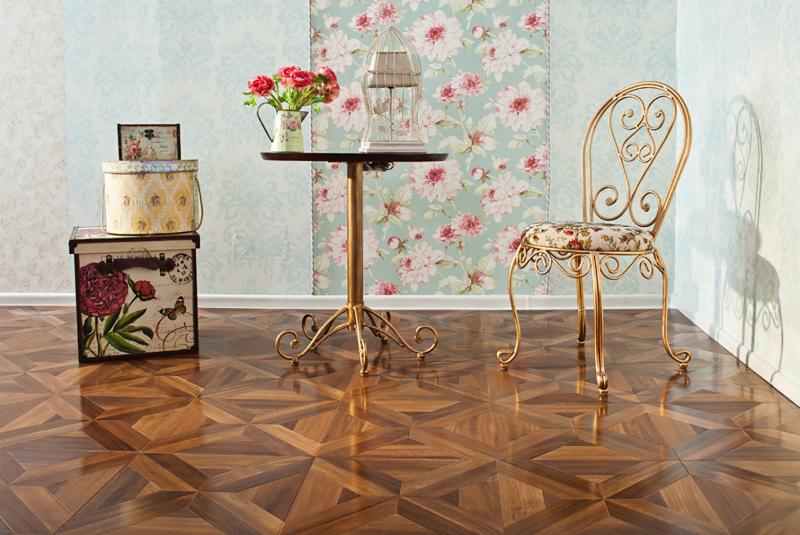
- the top layer is protective, made of polyurethane and aluminum oxide. This part of the flexible laminate is responsible for its appearance, as it allows you to simulate a variety of materials (wood, stone, tile). The polyurethane in the composition provides protection against mechanical stress. The top layer of a flexible laminate belongs to the 43rd class of wear resistance;
- the bottom layer is the main, wear-resistant, made of vinyl. There is an adhesive base or adhesive tape (smart tape) on it, which allows installing flexible laminate without special locking joints and ordinary glue.

Advantages of this flooring:
- 100% water resistant. Vinyl laminate can be laid in bathrooms, washing, baths, wet production rooms. Even water poured on the floor and left uncleaned for a long time will not do any harm to vinyl. This is one of its most important advantages, compared with a traditional laminate;
- Wear resistance. The flexible laminate is certified according to the 43rd class of wear resistance, which allows its use not only in residential, but also in industrial premises. The class of a conventional laminate is in the range of 21-34. The difference is obvious;
- Safety. Vinyl laminate is made from completely safe components. An ordinary laminate, even of good quality, incorporates formaldehyde, acrylic and melamine resins;
- Ease and high speed of laying. Flexible laminate with smart tape does not impose special requirements on the quality of the subfloor. It can even be laid on an old, not perfectly even floor covering. Installation of vinyl strips is very simple and even a beginner can do it. Average laying speed - 6-7 m2/hour;
- Excellent sound insulation properties that do not require additional noise protection measures in the form of a substrate;
- Possibility of use in underfloor heating systems;
- Maintainability. The spoiled strip easily comes off and is replaced with a new one. In this case, it is not necessary to dismantle the entire floor covering;
- Absolute fire safety.

Vinyl tiles are a great choice for flooring. About the pros and cons of the material, as well as an overview of the installation technology in the material of our site:https://floor.techinfus.com/en/pol-pokritiya/plitka/vinilovaya-plitka-dlya-pola.html.
Methods for joining a flexible laminate
The strips with glue smart-tape are joined to each other at the ends, that is, in a sense, it is an analogue of the castle joints of a traditional laminate. The lower part of such strips is offset from the upper (decorative) part by 20-25 mm, due to this, a free thin edge appears on the side - an adhesive smart tape is applied to it.

A flexible adhesive-based laminate is a plank, on the lower surface of which an adhesive is applied, which is protected until installation by a film. When laying, the protective film is removed and the laminate is glued to the prepared base. Such strips do not connect with each other.

Laying requirements
A vinyl laminate with a smart tape can be laid on almost any foundation, and without laborious preparations:
- Concrete floor it is necessary to pre-level the screed, repair large cracks, potholes, and chips with putty. At the last stage of preparation, you should use a primer. She will fix the top layer of a coupler and will not allow particles of cement mortar to stick to an adhesive layer of a flexible laminate.
- Wooden floor (Particleboard, plywood, laminate) under the flexible laminate should not bend and have gaps. The protruding hats of nails, self-tapping screws must be deepened into a wooden surface.
- Tile or stone tile also suitable as a base under a flexible laminate. The only thing you should pay attention to the seams. If they are too deep, then they need to be repaired with a puff or cement mortar.
For a flexible laminate with an adhesive base, the rough floor needs to be prepared more carefully. In this case, the planks will stick to the floor, which means they can repeat all its bumps. An ideal surface for such flexible planks is a bulk floor, even cement screed or plywood sheets.
A perfectly aligned subfloor plane is the main condition for long-term impeccable service and aesthetic appeal of a coating laid on top of it. We will tell you how to properly level the floor in the article:https://floor.techinfus.com/en/pol-pokritiya/laminat/kak-vyrovnyat-pol-pod-laminat.html.
The technology of laying this coating
Laying starts from the corner of the room. When using a laminate with a smart tape, the upper edge of the strips of the first row is cut, and then laid out along the wall with a thermal gap of about 3-5 mm.

The straps are interconnected, laying the top edge of one of them on a smart-tape of the other, overlapping. For better bonding of the elements, it is recommended to iron the joint with a hand or a rolling roller.

Plinth installation - the traditional completion of the device or floor repair. You can find a comparative overview of how to fix the skirting board here:https://floor.techinfus.com/en/pol-pokritiya/plintus/sposoby-krepleniya-plintusa.html.
Glue-based planks do not need a compensation gap, so they can be laid out close to the wall. A protective film is removed from them and glued, pressing, to the base. Thus, the first row of the laminate is laid out, making sure that the planks are lined up in a flat strip and do not move relative to each other. Even a slight offset of 1-2 mm will lead to the appearance of a visible gap between the underlying bar and the one that protrudes. Therefore, if you notice a bias, redo the marriage immediately: dismantle the bar and, having placed it correctly, carefully glue it again.
The second row usually does not start with the whole bar, but with a cut to 1/3 of the length. In this case vinyl coating will fully convey the aesthetics of a real laminate, the elements of which are traditionally stacked with offset.

In order to trim the bar, an approximate line is drawn on the front side with a ruler and a pencil. With a construction knife, make a shallow incision, bend the tile, after which it easily breaks.


If you have to lay a flexible laminate near columns, niches, ledges, then trimming the strips is performed using a template, for example, from thick cardboard. The template is applied to the bar, outlined along its contours, and then the unwanted part is cut with a knife or large scissors.
In the same way, lay out all subsequent rows of planks.

At the end of the work, it is recommended to walk around the finished coating to strengthen the adhesive joints. You can use the new flooring immediately after installation.
Video example of installation work
After the theoretical part, we suggest you watch a short instructional video. The presenters of the video talk about the characteristics of a flexible laminate and show the simplest (classic) way of laying it.

3 comments